LaFonera Hardware Cooling-System
From DD-WRT Wiki
| Revision as of 18:54, 2 May 2007 (edit) Hal (Talk | contribs) ← Previous diff |
Revision as of 21:31, 2 May 2007 (edit) (undo) Daemondust (Talk | contribs) (removing heatsink and RF shield) Next diff → |
||
| Line 115: | Line 115: | ||
| The CPU is 14x14mm. -[[User:Hal|Hal]] 16:24, 27 Apr 2007 (CEST) | The CPU is 14x14mm. -[[User:Hal|Hal]] 16:24, 27 Apr 2007 (CEST) | ||
| - | ===Instructions for removing the heatsink & | + | ===Instructions for removing the heatsink & RF shielding=== |
| - | Due to a request above, this is how I removed the heatsink and | + | Due to a request above, this is how I removed the heatsink and RF shielding. |
| - | The Heatsink is fixed to the PCB with two metal pins that are connected to the heatsink, and go through the PCB. The ends of the pins | + | The Heatsink is fixed to the PCB with two metal pins that are connected to the heatsink, and go through the PCB. The ends of the pins connected with small balls of solder. |
| - | + | ||
| - | + | ||
| ====Tools==== | ====Tools==== | ||
| - | + | #A soldering iron. Mine was set to 850 deg F, but it may not need to be that hot. One report shows that a 25W iron may not be hot enough. | |
| - | + | #Small flat-head screwdriver or similar to pry with. | |
| - | + | ||
| - | + | ||
| - | # | + | |
| ====How to do it==== | ====How to do it==== | ||
| =====Removing the Heatsink===== | =====Removing the Heatsink===== | ||
| - | + | #Heat your iron. | |
| - | # | + | #While applying outward pressure on the heat sink, heat both large pins on the bottom of the board. The solder flowed right onto my iron, without any flux or desoldering braid. You may need to use a solder sucker or braid to remove it. |
| - | + | #Once the solder is gone, use a screwdriver or other implement to lift the heatsink off the RF shield. It's attached with thermal tape. | |
| - | + | ||
| - | # | + | |
| - | + | ||
| - | + | ||
| =====Removing the heatspreader===== | =====Removing the heatspreader===== | ||
| Next the heatspreader needs to be removed to access the CPU directly. In theory you can get the top piece off without damaging it. It just clips on to the bottom of the heatspreader all the way round. | Next the heatspreader needs to be removed to access the CPU directly. In theory you can get the top piece off without damaging it. It just clips on to the bottom of the heatspreader all the way round. | ||
| - | No special instructions needed, just try to unfasten a clip while pushing it up. | + | No special instructions needed, just try to unfasten a clip while pushing it up. I used a small screwdriver to pop up all the tabs around the edges. |
| Now you can see the black CPU. If the thermal pad is still on it, take it off. It should come of very easily without leaving anything on the CPU to clean off. | Now you can see the black CPU. If the thermal pad is still on it, take it off. It should come of very easily without leaving anything on the CPU to clean off. | ||
| Line 150: | Line 141: | ||
| Now you can re mount the original small heatsink onto the CPU if you are going to re-use it. The most reliable way will be to use thermal epoxy. I recommend using [http://www.arcticsilver.com/arctic_alumina_thermal_adhesive.htm Arctic Alumina Thermal Adhesive]. Note - although that page says "''Arctic Alumina Thermal Adhesive IS NOT intended to be used between a CPU and the CPU heatsink.''" this means conventional PC CPUs and heatsinks which are designed with their own mounting system to hold them in place. It is fine to use in this instance. You can also use [http://www.arcticsilver.com/arctic_silver_thermal_adhesive.htm Arctic Silver Thermal Adhesive] (which will have slightly better conductivity) if you are careful not to get any on the PCB when you mount the heatsink. | Now you can re mount the original small heatsink onto the CPU if you are going to re-use it. The most reliable way will be to use thermal epoxy. I recommend using [http://www.arcticsilver.com/arctic_alumina_thermal_adhesive.htm Arctic Alumina Thermal Adhesive]. Note - although that page says "''Arctic Alumina Thermal Adhesive IS NOT intended to be used between a CPU and the CPU heatsink.''" this means conventional PC CPUs and heatsinks which are designed with their own mounting system to hold them in place. It is fine to use in this instance. You can also use [http://www.arcticsilver.com/arctic_silver_thermal_adhesive.htm Arctic Silver Thermal Adhesive] (which will have slightly better conductivity) if you are careful not to get any on the PCB when you mount the heatsink. | ||
| - | + | If you want to mount a larger heatsink then you will probably need to remove the lower RF shield frame, which the RF shield clips on to. This is how. | |
| - | + | ||
| - | If you want to mount a larger heatsink then you will probably need to remove the lower | + | |
| #Using the clippers cut each of the frame's corners vertically so that you have 4 separate straight sections. | #Using the clippers cut each of the frame's corners vertically so that you have 4 separate straight sections. | ||
| #Bend up each straight section to get rid of the fold. | #Bend up each straight section to get rid of the fold. | ||
| Line 161: | Line 150: | ||
| -[[User:Hal|Hal]] 22:59, 28 Apr 2007 (CEST) | -[[User:Hal|Hal]] 22:59, 28 Apr 2007 (CEST) | ||
| + | -Edits by [[User:Daemondust|Daemondust]] 23:31, 2 May 2007 (CEST) | ||
| ---- | ---- | ||
Revision as of 21:31, 2 May 2007
You are here: DD-WRT wiki mainpage / LaFonera / Hardware / Cooling-System
Contents |
La Fonera Fan Modification
So these things run pretty hot...
And if any of the pictures I've seen are true I'm not looking forward to my case melting and destroying itself.
Also not a big fan of capacitors that will only last 382 days at standard heat rating of this unit.
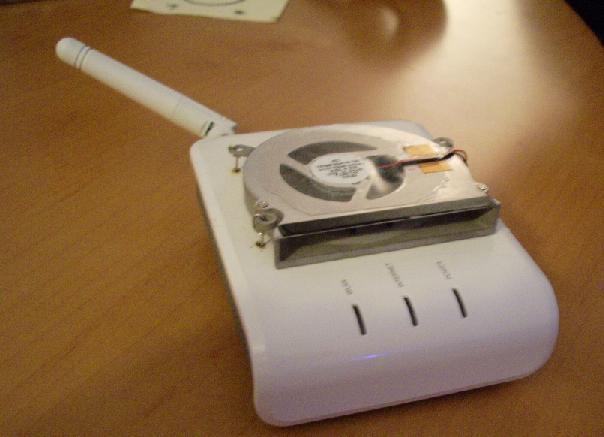
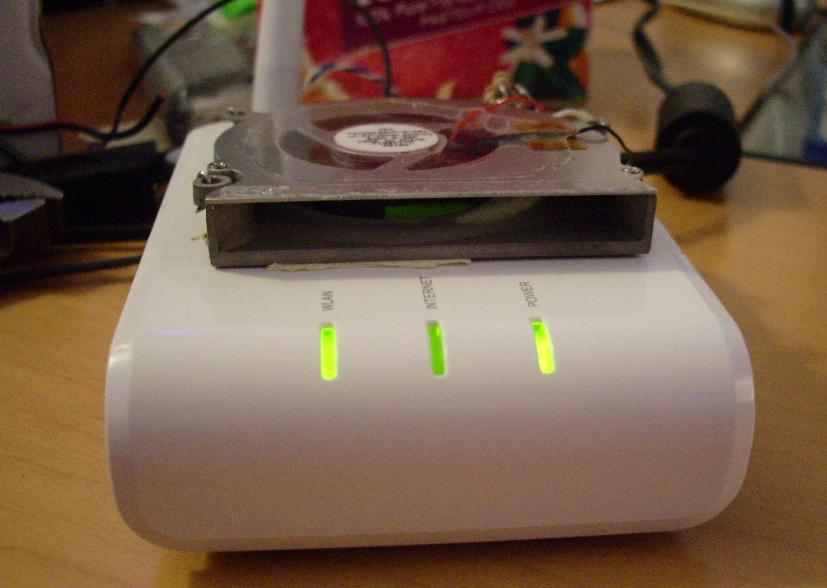
So to extend the life of this nifty little unit we shall simply add a clutch looking fan to the top. (how the fan looks is not really significant to its operation)
What we need
- Fonera
- Small Laptop Fan
- Switch(optional)
- Screw Driver
- Soldering Iron
- Solder
- Really Small Wire
- Resistors (optional,size depends on fan needs)
- Pliers
- Blow Torch
- Razor Blade
- Permanent Marker
- Post-it Notes
- Hot Glue
- Sand Paper
This is how we do...
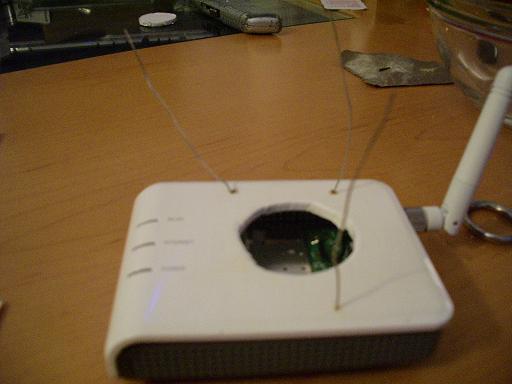
1. First remove the top cover by taking out the screws hidden under the two front rubber feet.
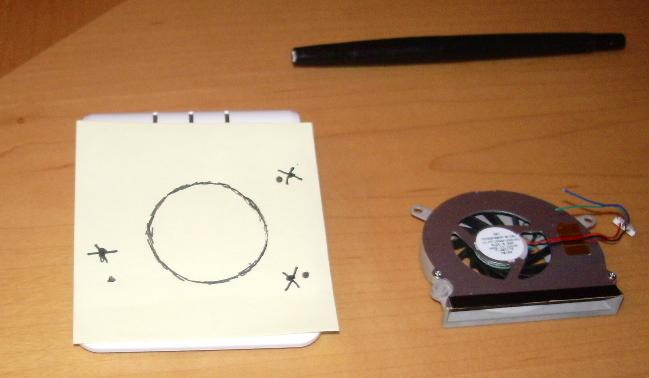
2. Stick the Post-it on the cover and then draw on the Post-it the size of the hole you want and where the anchor points will be.
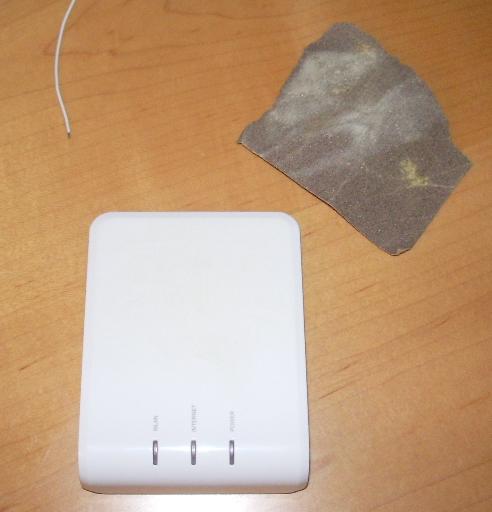
2a. Now is about when you should remove the "Fon" logo with sand paper.
3. After making sure you have the right placement on the cover. Transfer the marked hole and points through the paper by holding the marker down a bit.
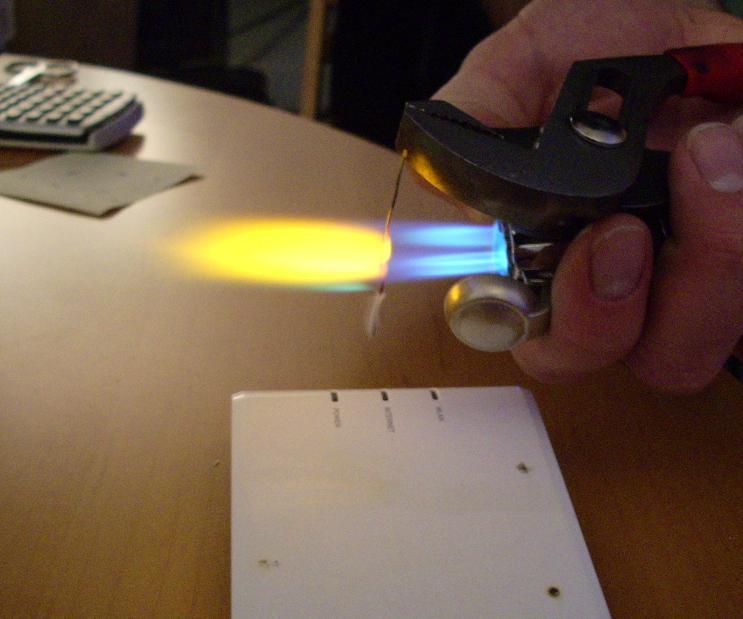
4. Melt the anchor holes with pliers and hot wire. Then cut the vent hole with heated razor blade.
5. Place blobs of solder at one end of the anchor wire. Once cool, insert the other end through the underside of the cover.
Right about now, the Author recommends, you should replenish the calcium, glucose, and vitamin C your brain has used up during this mod.
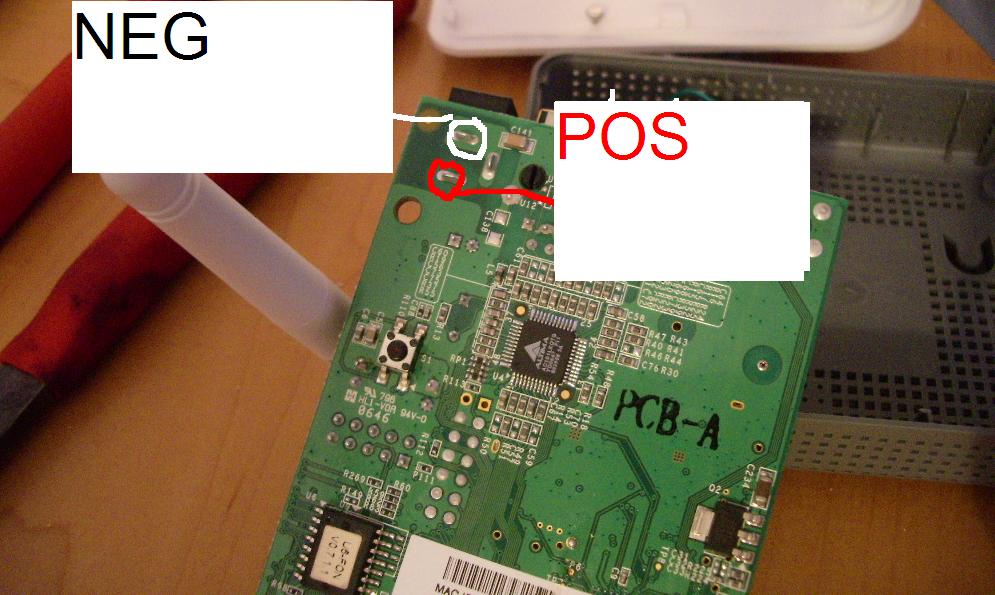
6. Stick the fan leads through the tiny vent holes on the side. Solder the leads to the positive and negative pins on board.
7. Replace the cover. Anchor the fan down by bending the leads. Replace the screws.
8. Use the glue gun to secure around the fan so it doesn't rattle too much. (Use it for the optional switch as well.)
Plug in and watch it spin!
Notes: The switch mod is really straight forward and should require little to no imagination. Just do it.
Additional Heat Sinks Modification
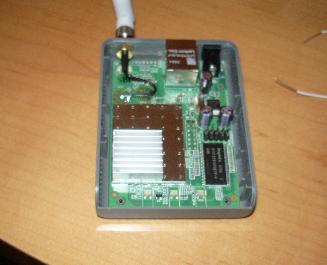
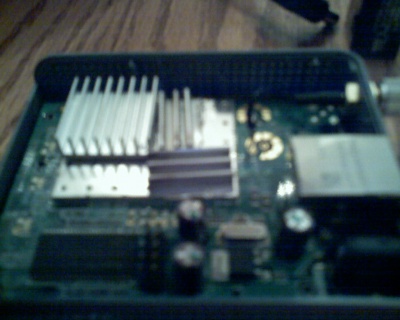
I added some addition heat sinks to help cool off my La Fonera. To do this, I took a TO-220 heatsink and cut it down so that it would fit in the case. This particular heat sink was double sided, so the fins were cut down the middle, and then in half. After the fins were cut and washed, I used conductive epoxy to attach them to the RF shield next to the stock heat sink. This particular epoxy was silver based, so it conducts heat particularly well. I put a thin layer of the epoxy on the bottom of the fins, enough to fill in any grooves or divots, but not enough that the excess epoxy would slip though onto the circuit board. Then I placed the new heat sinks and slid them around a little. This ensured a nice contact. Then I powered on the board so the solidifying reaction could occur at a faster rate.
This is the finished product, I'll put up a better pic once I find my camera cable.
Extending this Mod
- Maybe we should add a GPIO Connector to control the cooling fan.
- Also we could add a temprerature control.
- How about a (NTC)thermistor (where the resistance decreases with increasing temperature) set-up? Get the right rating, and the fan is all automated.
The Metal Heatspreader/Cover
I just took off the heatsink , and the upper and lower rectangular thin metal cover which covers the CPU. (Sorry, no photos, I don't have a camera with me.)
The heatsink is very inefficiently mounted on the cpu. First it has one thick thermal pad directly on top of the cpu to mate with the thin metal cover. Then there is a woven fabric based thinner thermal pad between the metal cover and the actual heatsink.
The bottom thermal pad is not even covering the whole CPU, as there is a metal support crossbar from the lower metal cover which goes over one side of the CPU. Also there is almost no pressure between the cpu and the heatsink. Note - the metal cover is not thermally connected to anything apart from the cpu.
With the metal cover completely removed (top and bottom) the top of the cpu is higher or equal to the height of other surrounding components, so a heatsink can be mounted directly onto it, which with some good thermal paste should give much better results than the default heatsink mounting.
There is room for a 12mm high heatsink, which means you could use a low profile chipset heatsink inside the case, with no external modification; with or without the fan. e.g. I have an old chipset heatsink from a DFI motherboard (2 photos here about half way down the page) which seems to fit if I remove the mounting mechanism which is useless for the LaFonera. Some fins need to be cut off to fit round the serial port headers though.
The CPU is 14x14mm. -Hal 16:24, 27 Apr 2007 (CEST)
Instructions for removing the heatsink & RF shielding
Due to a request above, this is how I removed the heatsink and RF shielding.
The Heatsink is fixed to the PCB with two metal pins that are connected to the heatsink, and go through the PCB. The ends of the pins connected with small balls of solder.
Tools
- A soldering iron. Mine was set to 850 deg F, but it may not need to be that hot. One report shows that a 25W iron may not be hot enough.
- Small flat-head screwdriver or similar to pry with.
How to do it
Removing the Heatsink
- Heat your iron.
- While applying outward pressure on the heat sink, heat both large pins on the bottom of the board. The solder flowed right onto my iron, without any flux or desoldering braid. You may need to use a solder sucker or braid to remove it.
- Once the solder is gone, use a screwdriver or other implement to lift the heatsink off the RF shield. It's attached with thermal tape.
Removing the heatspreader
Next the heatspreader needs to be removed to access the CPU directly. In theory you can get the top piece off without damaging it. It just clips on to the bottom of the heatspreader all the way round.
No special instructions needed, just try to unfasten a clip while pushing it up. I used a small screwdriver to pop up all the tabs around the edges.
Now you can see the black CPU. If the thermal pad is still on it, take it off. It should come of very easily without leaving anything on the CPU to clean off.
Now you need to remove the cross piece from the bottom of the heatspreader which partly covers the CPU. Use your clippers to remove the offending piece, or if you are going to remove the whole base to mount a bigger than normal heatsink, cut out the whole cross piece in the middle.
Now you can re mount the original small heatsink onto the CPU if you are going to re-use it. The most reliable way will be to use thermal epoxy. I recommend using Arctic Alumina Thermal Adhesive. Note - although that page says "Arctic Alumina Thermal Adhesive IS NOT intended to be used between a CPU and the CPU heatsink." this means conventional PC CPUs and heatsinks which are designed with their own mounting system to hold them in place. It is fine to use in this instance. You can also use Arctic Silver Thermal Adhesive (which will have slightly better conductivity) if you are careful not to get any on the PCB when you mount the heatsink.
If you want to mount a larger heatsink then you will probably need to remove the lower RF shield frame, which the RF shield clips on to. This is how.
- Using the clippers cut each of the frame's corners vertically so that you have 4 separate straight sections.
- Bend up each straight section to get rid of the fold.
- If you can, remove the excess metal on the frame with the clippers.
- If that is not possible, you can pull out the frame from the PCB quite easily. To do this, start at one end of a side, grip the metal with the pliers, and using the tip of the pliers as the centre of rotation, rotate the pliers upwards slightly to bend up a small part of the frame away from the PCB.
- Repeat as many times as it takes to pull out the whole side
- Repeat for as many sides as necessary.
-Hal 22:59, 28 Apr 2007 (CEST) -Edits by Daemondust 23:31, 2 May 2007 (CEST)
Addenum to Heatsink Removal/Fan Mod
Thank you to Hal for the in-depth information. I would however like to add the following:
Tools
I found it easier to remove the stock heatsink by using a Dremel with the heavier cutting disk (if you own a dremel tool). I don't reccomend using the standard/thin cutting wheels as I broke a few trying to cut the pins.....but I did not have plans to re-use the stock heatsink, and didn't care about any damage to it during cutting.
I also noticed the pins are not soldered at all - once cut, they drop out. The one other observation I had was I can't believe the crappy heatsink design! ANYONE owning one of these should replace it.
Some pics:
Showing the board with stock heatsink http://img391.imageshack.us/img391/5585/motherboarddv0.jpg
With the heatsink cut free, and the top of the metal shield removed. You can see the metal frame + cross-piece(creates a gap)that the shield covers....and the thermal pad that is supposed to transfer heat through the sheild to the heatsink. http://img387.imageshack.us/img387/8646/sinkremovedeh0.jpg
The replacement heatsink cut from a Geforce2 passive heatsink. Heatsinks are all about surface-area, and the new sink will triple that. An upgrade would be all copper, but the proliferation of aluminun ones makes your options easier. http://img125.imageshack.us/img125/9020/heatsinkscx5.jpg
Here's the new heatsink installed (have to agree about the Arctic Alumina thermal paste - works great). I also opted to use a copper heatsink on the ram chip seeing as I had a few lying around from a video-card kit. http://img258.imageshack.us/img258/6671/newsinksbq4.jpg
Here I measured, scribed, and cut a hole to match a low-profile celeron socket370 fan I had lying around (LO-OVE that dremel). http://img58.imageshack.us/img58/3856/holefanmi3.jpg
The finished product! http://img238.imageshack.us/img238/5453/formerfondp0.jpg
--Monkey34 08:00, 30 Apr 2007 (CEST)

